
Spring cleaning. My wife tells me it’s good! One aspect of our cameras that can easily go neglected is the sensor, where dust mites and spots can build up and cause unnecessary delays during post-production and cause prints to go out without notice – make time for camera sensor cleaning so this doesn’t happen to you!
Fear of Sensor Cleaning
Sensor cleaning may seem intimidating at first, yet with careful preparation it can save both time and money! Don’t fear touching that miraculous surface though – being gentle when doing so could save yourself hours and dollars of frustration later on!
If this doesn’t suit you, visit a camera store or repair depot and have their sensor professionally cleaned – costs vary between $35 and $100 depending on which camera and service center are chosen, plus additional shipping charges if it can’t be dropped off directly.
How Can I Know If My Camera Needs Sensor Cleaning? How can you tell if it’s Time for Sensor Cleaning? Sometimes it can be obvious when images require constant editing in post production, following your camera manual for shutter placement and battery charging as best practices if not connected directly.
Examine your sensor by shining a bright light through and adding magnifying glasses when possible. Even though you might not always notice discernable spots, there can still be degradation to your files that compromise their quality. Conduct tests: Take photos of an evenly lit plain white piece of paper or photograph clear blue skies then download and open in processing software after receiving your image downloads.
Adobe Camera RAW (ACR) provides an effective means of processing RAW photos. Click Healing Window in ACR and locate Visualize Spots checkbox at bottom. This will show whether additional work needs to be done or if your image needs further tweaks. Adobe Lightroom offers similar checkbox; for those that use Photoshop instead of ACR can create similar looks using Curves Layer with manipulable curves to achieve similar effects.
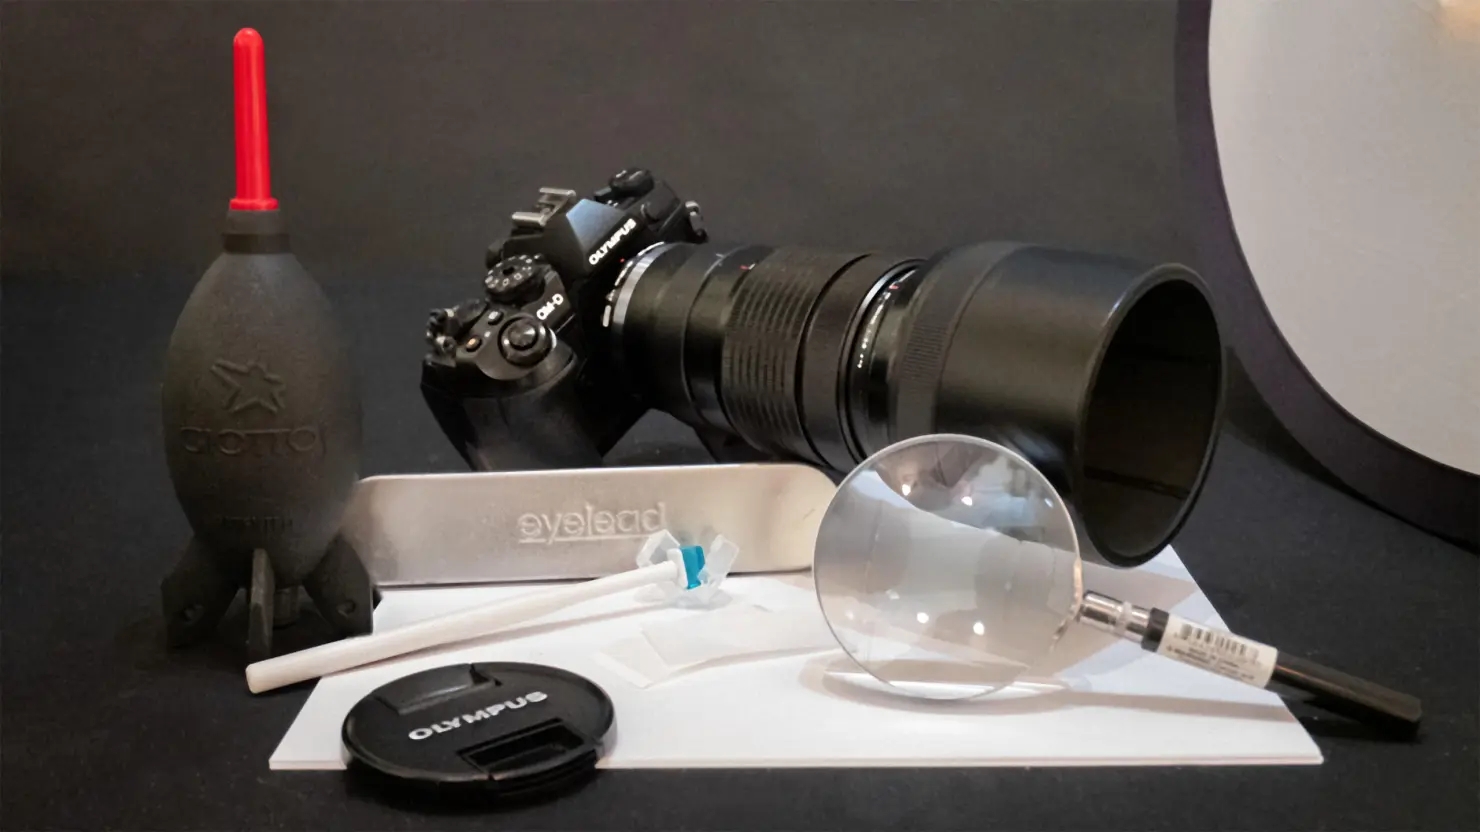
Are You Cleaned Up Already? When it comes time to cleaning the sensor yourself, there are numerous products on the market available for purchase. A common tool used is a squeeze blower; I recommend the Giottos Rocket Air Blaster as one option.
Use a squeeze blower to gently remove loose dust, rather than canned air as its force could be too great. Furthermore, there may be spray of liquid propellants which may muck things up further. Once finished with using the squeeze blower while holding down your camera lens opening and taking a test shot. Keeping gravity working against you may help minimize dust accumulation in future pictures!
My Go-To Cleaning Tool
Over time I have tried various methods for camera sensor cleaning and found Eyelead sensor cleaning system from Germany to be the best method with minimum hassle. A dust-sticking-bar can quickly remove dust by touching it to the sensor while sticky viscous paper removes it from its handle; 10 sheets come included with the kit while additional packs of 20 cleaning papers can be purchased separately for around $19. Note: Never touch either end of a dust-sticking-bar as oils from your fingers could render it ineffective!