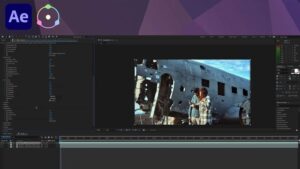
Dehancer is an After Effects plugin designed for film effects and color grading similar to analog filmmaking techniques, built to emulate them with nonlinear image processing and mathematical modeling techniques. The plugin utilizes real analog samples combined with non-linear image processing techniques as it builds profiles from real samples combined with non-linear image processing methods and mathematical models for optimal filmmaking results.
Apply the Dehancer Pro effect found under Film Emulation to your footage on the timeline. Unlike a LUT, Dehancer contains all the characteristics necessary for producing the desired “look and feel”.
Input, Film for PC
Most likely your source will be Rec.709. When selecting the Film parameter in Input/Film mode, choose from one of many available Profiles within Film parameter to give your image realistic color and contrast changes; Push/Pull parameter can then be adjusted as necessary to control exposure as you lighten or darken image and change Push/Pull for exposure control – each change enhanced by its respective film profile selection.
Film Developer
Sometimes certain source characteristics or conditions can alter the overall look of your video footage, and sometimes they need tweaks that the Film Developer tab can help with. Though our example footage doesn’t require them, for illustration purposes we will still use this footage for example purposes. Contrast Boost emulates analog contrast development while Gamma Correction and Color Separation will only have any impact when Contrast Boost is set above 0. While Color Separation affects most saturated colors while Color Boost adjusts overall saturation levels.
Film Compression
This tab simulates the compressed tonal range of film, and allows redistribution of highlights toward midtones without altering shadows. Raising Impact values compresses highlights towards midtones. The White Point controls the location of the white point within a luminance range, acting as a clipping threshold: when decreased it increases contrast while clipping highlights; on the contrary, increasing it flattens highlights. The Tonal Range parameter controls how the width of tonal range is altered, from no compression at all to having highlights and shadows fully affected by compression. Finally, Color Density manages color intensity from low highlight saturation up to high saturation levels.
Expand is designed to adjust a profile rather than correct its results, rather than correct any post actions done post selection of it. While its Black and White Point parameters might suggest otherwise, Expand adjustments are contrast attributes built into film profiles themselves so as to achieve smoothness without clipping by post actions performed afterwards.
Print
Here you can adjust values that mimic real analog media such as exposure, tonal contrast, color density and saturation. Tonal Contrast employs nonlinear compression to either soften or punch up images, and should you experience clipping please adjust Expand white/black points accordingly. All Print values work within digital contrast range; by activating Analog Range Limiter you can achieve a softer image with enhanced detail in shadows and highlights.
Color Head. Use this section for creative correction using similar tools or effects.
Film Grain Add realistic film grain simulation with this add-on. Adjust its size, amount and impact with respect to highlights, midtones and shadows for optimal results.
Halation
Halation occurs around bright lights, usually as an orangy red hue when overexposed. To create more halation, reduce or dim down the Source Limiter brightness until more orangy red appears, increase Background Gain so halation appears on more backgrounds, smooth out halos to soften their edges with Local Diffusion while Global Diffusion can warm skin tones more evenly.
Amplify intensifies the effect and orange hue of an effect while Hue helps adjust it from reddish to orangish hue. Blue Compensation lessens the influence that cool backgrounds have on seeing halation while Impact acts like an opacity control for its effects.
Bloom emulates the look of vintage lenses with bright light dispersion on contrasting areas that is amplified and distorted. Its Highlights setting defines which tonal range falls under this designation while Details determines what effects can be seen when certain sized objects are photographed and Diffusion regulates its radius of effect along its boundary.
Vignette
The Vignette tool creates a realistic effect by working off of exposure information present in an image source but applying itself at printing stage.
Film Breath and Gate Weave
This feature emulates the natural variations you may notice when filming, such as changes in contrast, color or exposure. The period setting determines how often this variation appears; other settings adjust its intensity.
Gate Weave simulates the cinematic feel of film running through a projector by simulating its swinging motion and offering customizable controls over period, amount, and angle of movement. You can add subtle movements simply by changing their duration period amount angle of movement.
False Color
This tool helps you quickly get an overview of the exposure or lighting distribution in your image.
As this post only touches upon what Dehancer can do, watch this short tutorial video below for an in-depth demonstration. If Dehancer could add value to your work, use promo code ANDYFORDVIDEO at www.dehancer.com to receive 10% OFF the plugin price!